If you’ve ever worked with metal stamping dies—whether you’re a production manager, toolmaker, or product design engineer—you know there’s a fine line between under-sizing your stamping press and over-buying capacity. As a metal stamping dies supplier with 12 years in the game, I’ve seen both play out: a small manufacturer who tried to skimp on press tonnage for a deep-draw automotive bracket, only to watch their die crack mid-run and lose 3 days of production; and a large aerospace firm that overspent 20% on a press with double the needed capacity, tying up cash they could have used for new tooling. Today, I’m breaking down exactly how to calculate the tonnage requirements for your stamping die—no fancy proprietary software needed, just the math I’ve refined on hundreds of projects, plus the real-world checks that keep you from making costly mistakes. Metal Stamping Dies
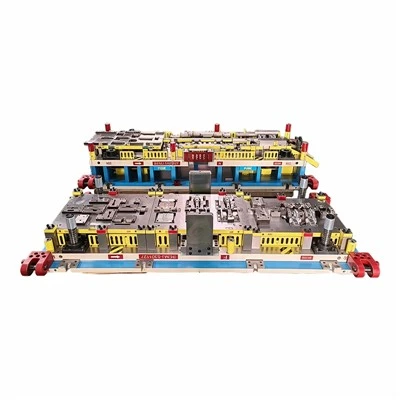
First, let’s get one basic definition out of the way: stamping tonnage isn’t just the total force of a press. It’s the maximum force the press needs to apply to your specific die and part to complete every operation in your stamping sequence, from blanking and piercing to bending and drawing. Miscalculate this, and you’re either straining your die (leading to premature wear or failure) or wasting money on a press that’s too big.
The starting point for almost every calculation is shear force—this is the force needed to cut through your metal, which is the foundation of almost all stamping operations. The formula for shear force is straightforward, but I’m going to explain it so you don’t just plug numbers in blind: Shear Force (in tons) = (Material Thickness × Total Length of Cut × Shear Strength of Material) ÷ 1000. Let’s break each part down, because every number here matters.
First, material thickness. This isn’t the nominal thickness listed on a spec sheet. For example, 16-gauge steel might be listed as 0.0598 inches, but actual mill thickness can vary by ±0.003 inches, depending on the steel grade and supplier. If you’re using high-strength low-alloy (HSLA) steel, I always recommend measuring actual thickness of the lot you’ll be using, not just the catalog number. A thousandth of an inch might not sound like much, but when multiplied by a 100-inch cut length, that’s 0.1 extra inches of material, which translates to extra force.
Next, total length of cut. This is the perimeter of every cut feature on your part—blanks, holes, notches, all of it. Let’s say you’re stamping a simple rectangular blank with a 2-inch by 4-inch shape: total cut length is (2 + 4) × 2 = 12 inches. If you add four 0.5-inch diameter pierce holes, that’s 4 × (π × 0.5) = ~6.28 inches, so total cut length becomes ~18.28 inches. If your part has complex features, like irregular notches or embossed logos, I always recommend laying the part flat on paper and tracing every cut edge to make sure you don’t miss a segment. I once worked with a client who forgot to include the length of a tiny inner notch on a bracket, leading to a 15% under-estimate that made their die stall mid-run. Oops.
Third, shear strength of your material. This is where a lot of people go wrong—shear strength isn’t the same as tensile strength, and it varies wildly by material grade. For example, mild 1018 steel has a shear strength of ~30,000 psi, while 304 stainless steel is ~40,000 psi, and aluminum 6061-T6 is ~20,000 psi. If you use tensile strength by mistake (which is typically 1.5 times higher than shear strength for most metals), you’ll over-calculate tonnage by 50% and waste money on a larger press. Always pull the specific shear strength value for your exact material grade from the supplier’s material data sheet (MDS) or a reliable metal properties table. For reference, I keep a cheat sheet in my office that lists common stamping materials and their shear strengths, but I never use it as a substitute for checking the actual MDS for each job.
That formula works for single-operation jobs—like if you’re just cutting a blank and moving on. But most stamping dies do multiple operations in one run: bending, drawing, coining, all of which add extra force. This is where the basic shear formula stops being enough, and you have to adjust for secondary operations.
Let’s take bending first. Bending tonnage is different because bending uses compressive force rather than shear force to form metal. The formula for approximate bending tonnage is Tons = (Material Thickness² × Bending Length × Bending Constant) ÷ Die Opening. The bending constant varies by material: mild steel is ~1, aluminum is ~0.7, stainless steel is ~1.3. The die opening is critical here—for most V-bending (the most common type), the die opening should be 8 times the material thickness for mild steel. If your die has a smaller opening, you’ll need more force, and if it’s larger, less. For example, bending a 1-inch long, 0.06-inch thick 1018 steel part with a die opening of 0.48 inches: that’s (0.06² × 1 × 1) ÷ 0.48 = 0.0075 tons, or about 15 pounds—super low, which is why bending is rarely the dominant force in a stamping job, but it adds up if you have 10 bends per part.
Drawing is the most operation that can throw your tonnage estimate way off, especially for deep drawn parts—think soda cans, automotive chassis components, or kitchen sinks. Drawing force depends on three big factors: the diameter of the blank, the diameter of the drawn cup, material thickness, and the coefficient of friction between the metal and the die. The general rule of thumb for drawing tonnage is that it’s 15% to 30% of the shear force of the blank, but for deep draws (where the depth is more than half the cup diameter), that percentage can jump to 40% to 50%. I once worked on a 6-inch deep drawn aluminum heat sink for an LED light; the shear force of the blank was 2 tons, but the drawing force alone was 0.9 tons, almost half the total. If I’d skipped accounting for drawing force, my estimate would have been 45% too low.
Coining is another operation that requires extra force—coining is when you compress the metal to create a precise, smooth surface, like embossing a part number or creating a tight fit between two stamped parts. Coining force is roughly equal to the area of the coined feature multiplied by the material’s yield strength. For example, coining a 1-inch square logo on 0.08-inch thick stainless steel with a yield strength of 30,000 psi: that’s (1 × 1 × 30,000) ÷ 1000 = 3 tons. That’s a big addition, and it’s easy to miss if you’re only calculating shear force.
Now, once you add up all the forces from each operation—shear, bending, drawing, coining—you have your base tonnage. But here’s the real secret I learned over the years: you never stop at the base number. You have to add a safety factor, and that safety factor changes based on your operation and part complexity. For simple, low-volume jobs, I use a 20% safety factor. For high-volume, complex parts with deep draws or tight tolerances, I use a 30% to 40% safety factor. Why? Because even if you measured material thickness and cut length perfectly, there are variables you can’t account for: dulling die edges over time (which increases force by up to 10% after 10,000 hits), inconsistent material hardness from the lot, or slight variations in part placement on the die. I once had a job where a supplier’s new steel grade was 5,000 psi harder than their MDS claimed, and my 20% safety factor wasn’t enough—we had to upgrade the press tonnage by 15% mid-production, which cost the client a few thousand dollars. That’s when I switched to 30% for all high-volume jobs.
Wait, but what about progressive dies? That’s another common scenario, where a die runs multiple operations in sequence, like piercing a hole, blanking a shape, bending two flanges, all in one pass through the press. For progressive dies, you don’t add up all the forces—you have to calculate the maximum force needed at any single point in the sequence, because the press is only applying one set of operations at a time. For example, if your progressive die does piercing (2 tons), then blanking (3 tons), then bending (0.5 tons), the peak force is 3 tons, so your tonnage requirement is based on that, not the sum of all three, which would be 5.5 tons (that’s a common mistake I see new engineers make). I had a client last year who summed all operations for a progressive die, ordered a press with 5.5 tons, and found that during the blanking step, the press was only applying 3 tons, leaving the extra capacity unused—total waste of $12,000 on a larger press than needed.
Now, let’s talk about real-world examples to tie all this together. Let’s say you need a stamping die for a bracket made from 1018 steel, 0.06-inch thick, for a lawn equipment manufacturer. The part has: a rectangular blank (3 inches by 5 inches), two pierce holes (0.25-inch diameter each), two 90-degree bends, and no drawing or coining. First, calculate shear force: total cut length is blank perimeter (3+5)2=16 inches, plus two pierce holes (2 * π0.25=1.57 inches), so total cut length is 17.57 inches. Shear strength of 1018 steel is 30,000 psi. Shear force = (0.06 * 17.57 * 30,000) / 1000 = 3.16 tons. Now, add bending force: each bend is 1 inch long, so total bend length is 2 inches. Bending constant for 1018 is 1, die opening is 8*0.06=0.48 inches. Bending force = (0.06² * 2 * 1) / 0.48 = 0.015 tons. Base total force is 3.16 + 0.015 = ~3.175 tons. Add a 25% safety factor for good measure: 3.175 * 1.25 = ~4 tons. So your required press tonnage is 4 tons. That’s a simple, low-volume job, so that works. For a deep draw automotive oil pan, on the other hand, shear force is 15 tons, drawing force adds another 8 tons, total base force 23 tons, plus a 35% safety factor gives ~31 tons, so you’d need a 35-ton press to be safe.
Now, what are the common mistakes I see every day, and how to avoid them? First, ignoring material variability. As I said earlier, never use nominal thickness, always measure actual stock. Second, mixing shear and tensile strength. This is the #1 mistake— I’d say 40% of the new engineers I work with do this at least once. Third, forgetting secondary operations like drawing and coining. Blanking is easy, but drawing can add 20-50% to your tonnage, so don’t skip that calculation. Fourth, under-estimating safety factors. I’d rather a client have a press that’s slightly over-sized than a die that breaks mid-production. Fifth, for progressive dies, summing all operations instead of taking the peak force. That’s a costly mistake that I see in about 20% of small business quotes I review.
Now, if you’re working with a metal stamping die supplier, like ours, we don’t just rely on your calculations—we do our own internal review, plus a test run with a prototype die to verify tonnage. But if you’re calculating this on your own, you can use a few quick checks to make sure you’re on track. One is the rule of thumb for steel: 1 ton per 0.01 inch of thickness per inch of cut length. So for 0.06-inch thick steel, that’s 0.06 tons per inch of cut length, which is almost exactly the formula we used earlier for the example bracket—super simple for quick estimates. For aluminum, it’s about 0.04 tons per inch of cut length, and stainless steel is about 0.08 tons, so that’s a quick way to ballpark it before doing the full formula.
Wait, one last thing: when you’re buying a stamping die, not just calculating press tonnage, remember that the die itself has a tonnage capacity too. The die’s capacity is usually rated by the press it’s designed for, so make sure the die’s rated tonnage matches the press’s rated tonnage. A die designed for a 4-ton press won’t work on an 8-ton press, because the extra force will warp the die and ruin part geometry. That’s another common mistake I see—clients buy a bigger press to save money, but their existing die can’t handle the extra force, so they have to replace the die, which is way more expensive.
At the end of the day, calculating stamping die tonnage is part math, part experience. I’ve done this so many times that I can look at a part sketch and give a rough tonnage estimate in 5 minutes, but I still go through the full formula for every job, because one small variable can throw everything off. If you’re designing a new part and need help calculating the right tonnage for your stamping die, or if you’re looking for a custom die that’s sized to your exact requirements, reach out to our team. We’ve worked with manufacturers from automotive to medical, small startups to large corporations, and we’ll make sure your die is sized correctly the first time—no costly reworks, no overspending on capacity.
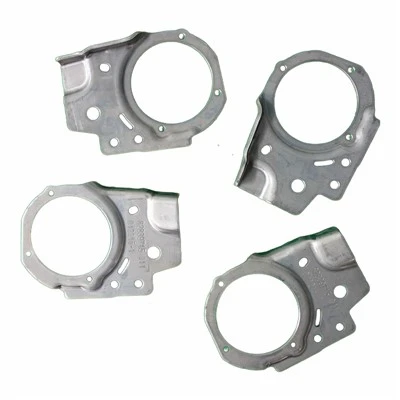
If you’d like help refining your tonnage calculations or discussing your next stamping project, feel free to reach out to our team for a consultation.
Automotive & EV Stamping Parts References
- ASTM A1005, Standard Test Methods for Shear Strength of Metallic Materials
- Metal Stamping Technology Handbook, Society of Manufacturing Engineers (SME)
- Cold Forming and Stamping Fundamentals, American Iron and Steel Institute (AISI)
Dongguan Changdong Tool & Die Co., Ltd.
With abundant experience, we are one of the most reliable metal stamping dies manufacturers and suppliers in China. Please feel free to buy advanced metal stamping dies made in China here from our factory. Good service and quality products are available.
Address: No. 56-B, Fumin South Road, Dalang Town, Dongguan City, Guangdong Province, China
E-mail: sales@stamping-die.com
WebSite: https://www.metalstampingdie.com/
