Hey everyone, let’s cut to the chase—if you’re running an apparel printer (or if you’re an apparel print shop that’s been fighting wonky, off-kilter designs, we see you), print alignment isn’t just a “nice-to-have.” It’s the thing that turns a $5 graphic tee into a customer keepsake, or a bulk order for a brand into something they’ll rebook you for. As someone who’s been an apparel printer supplier for over a decade, I’ve heard every frustration: “My left chest logo is ¼ inch off on 10% of this run” or “My screen print transfers skew mid-job so bad I had to throw 20 shirts away last week.” Alignment issues don’t happen by accident—they’re usually from skipping small, consistent checks, not a broken printer. Let’s break down exactly how to lock in perfect alignment every single time, no random headaches. Apparel Printer
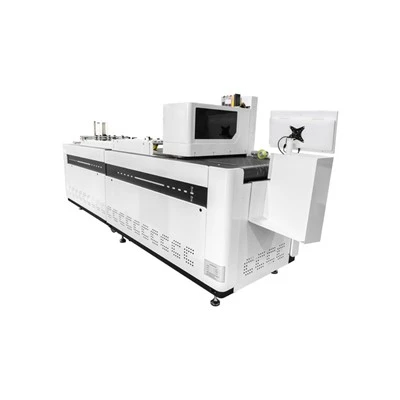
First, let’s get the basics straight: apparel printers (whether you’re using direct-to-garment (DTG), heat press transfers, screen prints, or even DTF) all rely on three core alignment checks that people sleep on. I’ve seen new shops skip these because they’re in a rush to crank out jobs, and end up wasting more time fixing messes than just doing the checks first. Let’s start with the “before-you-turn-on-the-printer” prep, because half the alignment problems start before you even load a design file.
Wait, let’s get one thing out of the way first: your design file’s bleed isn’t the same as alignment. A lot of people confuse intentional overlap (like a screen print’s ⅛ inch edge bleed) with actual skew. So when you’re setting up your design, make sure you’re exporting it at the exact size and position you want, with zero random scaling or offset. I’ve had customers call me panicking because their logo was “off” only to realize they accidentally set the design to 98% scale instead of 100%—their printer was perfect, their file was the problem. Quick pro tip: for DTG or DTF, always set your design’s origin point to the top-left corner of the artboard, not the center. Why? Most printer software (like our go-to workhorses, Epson-based setups for DTG, or the standard RIP software for transfers) uses top-left as the reference, so if your origin’s off, everything skews. If you’re designing in Adobe Illustrator or Canva, just lock that origin and don’t drag the artboard around last minute—too many people tweak the artboard to line up with a shirt’s collar without adjusting the design’s position, and boom, alignment errors before the print even hits the fabric.
Next up: the machine itself. You can have a perfect file, but if your printer’s bed is dirty, worn, or not calibrated, alignment is toast. Let’s talk about printer maintenance for alignment—this isn’t the deep clean every 6 months (though that helps), it’s daily, 2-minute checks. First, the platen. The platen is the flat surface your shirt lays on, right? For DTG printers, if the platen has ink buildup, lint, or old adhesive from platen tape, that makes the shirt sit lopsided. Even a tiny bit of gunk can lift one side of the shirt 1mm, which translates to a 1mm offset in your design. I tell all my clients to keep a lint roller and a microfiber cloth right next to the printer. Every time you load a new shirt, roll the lint roller over the platen, wipe it down with a dry cloth, and make sure there’s no sticky residue. For heat press-based printers (like those that do transfers), the press’s heat platen needs to be flat—no dents from dropping a shirt, no uneven coating. If you press down and the platen isn’t level, your transfer will skew as it cools. Quick test: lay a piece of paper on the platen, close the press, and check if the paper is lying flat all over—no wrinkles, no lifting corners. If it’s not, the platen’s out of alignment, and that’s an easy fix with a few adjustment screws (most printers have a tool to tweak this, no tech support needed).
Then there’s the alignment calibration, which is different for every printer type. Let’s split this by the most common setups, because one size doesn’t fit all. For DTG printers (super popular for custom small runs), calibration is non-negotiable. Most DTG printers have a built-in alignment test print—usually a sheet with a grid of squares, each with a tiny mark. When you print that, you line up a ruler over the marks and adjust the X and Y axis alignment in the printer’s software. A lot of people do this once, then never touch it again. But here’s the thing: your platen wears over time, and if you’re printing on different shirt sizes (small vs. 3XL), you need to re-calibrate for the platen height. Wait, right! If you’re using an adjustable platen (most are these days), a small shirt sits higher on the platen than a big one, so the print head’s distance (called the gap) changes, which affects alignment. I tell clients to do a quick calibration check every time they switch shirt sizes. It takes 2 minutes, and I’d rather have you do that than re-print a whole 50-shirt run. For DTF printers, alignment is a bit different—since you print the design on a film first, then transfer it, the film’s positioning relative to the printer’s feed matters. DTF printers use a roll film, so if the feed roller is dirty or worn, the film can stretch or skew as it feeds through. The fix here is to check the film’s edge as it feeds—if it’s wandering left or right, clean the feed rollers with isopropyl alcohol and a cotton swab. Most DTF printers also have a “film alignment” setting that adjusts for small feed errors, so you don’t have to manually reposition every sheet.
Now, for the actual loading of the shirt or film—this is where even experienced shops mess up. Let’s start with shirts: you can’t just throw a shirt on the platen and smooth it out. You need to use alignment guides, and that’s not just a fancy add-on we sell (though we do make great ones!). Most apparel printers have small plastic pegs or edge guides on the platen that fit into the shirt’s collar or side seams. Here’s the trick: line the collar’s bottom edge up with the platen’s top guide, then pull the shirt’s sides tight against the side guides, but don’t stretch the fabric. Stretching the fabric will make the design shift when you press, so you want it smooth, not tight. For left chest logos specifically (one of the trickiest alignments because it’s a specific spot), measure from the collar’s center point down to the logo’s top—for adult tees, that’s usually 7 to 9 inches, depending on the shirt size. For kids’ tees, it’s 4 to 6 inches. If you’re printing a bulk order, mark the center of the collar on a few sample shirts first, so you have a reference for every one. I’ve had clients come to me with a run of 100 tees where the left chest was off because they just guessed the spot without a sample—$1,500 in waste, all because they skipped the 5-second measurement on one test shirt.
What about transfers, if you’re using heat presses instead of a dedicated apparel printer? A lot of small shops use a heat press with a cutter, so alignment here is about the transfer’s position on the shirt and the press’s pressure. For heat press transfers, you should pre-mark the shirt’s center (both horizontally and vertically) with a fabric marker—small, barely visible dots, not big lines. Then, line the transfer’s center dot up exactly with the shirt’s dot. If you’re printing multiple colors (like a graphic with a base layer and a top layer), you need to do a color alignment check before pressing the top layer. That’s called “register marks”—most transfer software lets you add small register marks to each color layer, so you can line them up visually. If the colors are off by even 1mm, your design will look sloppy. Pro tip: don’t press the transfer too hard too fast. If you slam the press shut, the transfer can slide on the shirt before it sets, which causes alignment errors. Slow, even pressure for the recommended time is way better than a hard slam.
Now, common missteps that people don’t even realize are causing alignment issues. Let’s talk about file scaling again, because we touched on that, but it’s worth repeating. If you’re using a design from a third-party, make sure you’re scaling it to the exact size you need at 100% resolution. A lot of people will download a logo that’s 500px wide, then scale it to 10 inches wide in the printer software—this reduces the resolution, but also can mess with the design’s origin point, leading to offset. Always work with the design’s native size first, only adjust position, not scale, once it’s in the printer software. Another big one: environmental factors. If your print area is too humid, or too cold, the fabric or film can expand or contract, leading to alignment shifts. For example, DTF film can stretch if it’s too humid, so if you’re printing in a basement with no AC, keep a dehumidifier nearby. Or if your shop is in a cold garage, heat the area to at least 65°F (18°C) before printing—temperature changes can make platen metal shift slightly, leading to alignment errors. I’ve seen a shop in Michigan have a whole run ruined because they printed in a garage that was 45°F, and the platen warped a tiny bit overnight.
Let’s also talk about troubleshooting when alignment does go wrong, so you don’t waste a whole run. If your design is consistently offset by 2mm to the left, that means your X-axis alignment is off—go into the printer’s calibration settings and adjust the X offset by +2mm. If it’s skewing as you print (like the top of the design is further left than the bottom), that’s usually a platen that’s not flat, or a feed roller issue for roll-based printers. The quick fix there is to stop the job, check the platen’s flatness, clean the feed rollers, and re-calibrate before starting again. Never try to fix it mid-job by nudging the shirt or film—you’ll just make it worse, and probably ruin more pieces.
Now, as your apparel printer supplier, I’ve seen that the shops that have perfect alignment every time are the ones that build these checks into their daily routine, not just for big jobs. It’s not rocket science, it’s 2 minutes of prep, a quick calibration, and not cutting corners on loading the shirt. I can’t tell you how many times a new customer has called me saying their printer is broken, only to find out they skipped a calibration check or didn’t clean the platen. That’s the stuff we fix on a daily basis, so I want you to avoid it.
Wait, one last thing: if you’re investing in a new apparel printer, make sure it has easy-to-use alignment tools. A lot of budget printers skimp on calibration features, which is why we prioritize making sure our customers’ machines have simple, clear alignment steps in the software. You don’t need a PhD to calibrate a good apparel printer—if it takes longer than 5 minutes to do a quick check, that’s a red flag.

At the end of the day, perfect alignment isn’t about having a fancy $10k printer. It’s about consistent, small checks: calibrate before runs, clean the platen, line up your shirt properly, and double-check your design file. If you’re still struggling with alignment issues, or you’re in the market for an apparel printer that makes these checks easy, feel free to reach out to our team to chat through what you need. We don’t do generic sales pitches—we’ve worked with shops of all sizes, from 1-person home setups to large bulk print operations, so we know exactly what causes alignment problems and how to fix them for good.
UV Printer References:
- International Apparel Print Association. (2022). Core Calibration Standards for Digital Apparel Printers.
- Print Wear Magazine. (2023). Common Alignment Errors in Custom Garment Printing: Root Causes and Quick Fixes.
- Technical Guide to DTF Printing Equipment. (2021). Roll Film Alignment and Feed Maintenance Protocols.
Shenzhen Guangyin United Technology Co., Ltd.
With abundant experience, we are one of the most professional apparel printer manufacturers in China. If you’re going to buy high quality apparel printer made in China, welcome to get quotation from our factory. For price consultation, contact us.
Address: 2nd Floor, Building 7, No.3, Liulian Community, Pingdi Subdistrict, Longgang District, Shenzhen, China
E-mail: guangyinlianhe@gmail.com
WebSite: https://www.chinauvprinter.com/
