Hey, let’s cut to the chase – if you’ve ever peeled an old adhesive label off a box, jar, or even a laptop and been left with that messy, sticky residue that’s impossible to get off without smudging or scratching the surface, you know the frustration. I’ve been in the adhesive label game for over 10 years, chatting with everyone from small business owners who use our labels for product packaging to office managers dealing with dead file drawers. Almost every week, someone hits me up asking: “How do I get this sticky gunk off without ruining what’s underneath?” Adhesive Labels

I get it. When we design our labels, we make ’em strong enough to stick tight during shipping, last through a rainstorm, or stay on a vintage milk jar someone’s upcycling. But that same strong adhesive? It’s the enemy when it’s time to remove it. Today, I’m breaking down the science behind that sticky mess, the mistakes most people make, and the actual ways to clean adhesive labels without smudging – straight from someone who works with these sticky substances every single day. No fancy tech jargon, no random hacks that sound too good to be true, just what works.
First, let’s talk about why labels get smudged in the first place. Here’s the quick science 101: Adhesives are usually made of polymer chains – think of them as tiny, stretchy, sticky strings that grab onto whatever’s under the label. When you rip a label off too fast or yank at it unevenly, those polymer strings snap right off, leaving half of ’em stuck to the surface. If you then scrub the residue too hard or use a harsh chemical, you either spread those broken polymer chains all over (that’s the smudge!) or scratch the surface they’re on. Smudging isn’t just messy – it’s basically those tiny sticky bits getting pushed into every little crevice instead of being lifted off. Most people rush this step, and that’s where they mess up.
Let’s start with the worst mistakes I see folks making, because avoiding these alone will save you so much trouble. Number one: Peeling labels off when they’re cold. I’ve heard this from so many people – they finish unpacking a box from the back of their cold garage, grab a label, and yank. Bad call. Adhesives get brittle when temperatures drop. Those polymer chains snap instead of stretching, which means way more leftover residue. Number two: Using straight rubbing alcohol or nail polish remover. Wait, hold on – those can work, but only if you use them wrong. A lot of people pour a glob on a paper towel and scrub like crazy. That spreads the sticky polymer chains instead of lifting them. Also, if the surface is plastic (hello, old water bottles or food containers), strong solvents can actually break down the plastic, leaving a weird cloudy mark. Number three: Scratching at residue with a knife or key. Duh, you might think, but I’ve seen it! Scratching breaks the sticky bits into tiny pieces that get pushed into the surface’s pores, leading to that smudged, gritty look that’s impossible to fix.
Now, let’s get to the good stuff – the step-by-step methods that actually work, no smudging required. I’m categorizing these by surface type too, because a label on glass is way different than one on a plastic storage bin or a painted metal toolbox. Trust me, surface type changes everything.
First, let’s do the easiest, most low-effort method that works on 90% of surfaces: The Heat & Peel Method. This is my go-to, especially for labels on glass, metal, or even wood. Here’s why it works: heat softens those polymer adhesive chains, making them stretch instead of snap, and lets you lift the label off in one piece. No leftover gunk, no smudging. How to do it right? Don’t use a hair dryer on high heat from 2 inches away – that’s too intense. Set it to medium, hold it 4-6 inches from the label, and move it back and forth. Spend 30-60 seconds heating the whole label, not just one spot (I see people heating the corner and peeling immediately – that leaves the rest stuck). Once the label feels warm to the touch, try lifting a corner gently. If it comes up smooth, peel slow, at a 180-degree angle (parallel to the surface, not straight up). If it starts to tear, hit that spot with heat again. No scraping needed, no smudges.
Wait, what if heat isn’t an option? Maybe you’re dealing with a delicate surface like a vinyl decal on a phone case, or a painted ceramic mug that can’t take high heat. Then go with the Soak & Dissolve Method. For this, you need something that’s gentle enough to not damage the surface, but strong enough to break down the adhesive polymers. Skip the harsh stuff – I recommend using dish soap and warm water first, that’s underrated. Mix a few drops of mild dish soap (like Dawn Original – no fragrances or bleaches) with warm water in a bowl, soak a clean cloth, and lay it over the label. Let it sit for 5-10 minutes – don’t rub it right away. The soap works its way under the label, loosening the adhesive. After soaking, gently rub the label corner with the cloth. It should lift right off. If there’s a little residue left, dampen the cloth again and wipe – no pressure, just light motions. This works on plastic, ceramic, painted surfaces, and even fabric labels (though test it on a hidden spot first for fabric).
But what if you’ve already got that stubborn residue, the kind that’s not budging with soap and water? Let’s talk about the targeted dissolve method, for when you’ve already peeled the label and are left with sticky gunk that’s smudged. First, stop scrubbing. Grab a microfiber cloth (paper towels are too rough and leave lint, which makes smudges worse). Spray a tiny bit of white vinegar or rubbing alcohol (70% is ideal, not 91% – that’s too strong) onto the cloth, not directly onto the surface. Pouring liquid directly on plastic can cause that cloudy look I mentioned earlier. Then, dab the residue, don’t rub. Rubbing smears the sticky polymer chains around. Dab, and if it starts to lift, gently wipe in one direction (like left to right, not back and forth) to avoid smearing. For really tricky spots, let the damp cloth sit on the residue for 2 minutes, then dab again. I’ve tested this on labels we put on our industrial metal shipping crates – even the ones that’ve been out in the sun for a year, this gets the residue off without smudging.
Wait, what about tricky surfaces? Let’s break down the weird ones because these are where most people mess up. For plastic food containers (the ones you recycle after takeout, or the Tupperware with labels), never use harsh solvents like acetone – that makes plastic break down. Stick to the heat method (use a hair dryer on medium, or even run the container under warm tap water for a minute) then peel slow. If there’s residue, a little baking soda mixed with water makes a gentle paste, rub super lightly with a microfiber cloth – it lifts residue without scratching. For glass jars you want to upcycle into candles or planters? The heat method works perfectly, and if you have a little residue, a drop of olive oil on a cloth will lift it, no smudges, no chemicals. For wood furniture or decor (say, a vintage crate with a label), heat is risky because it can warp or damage the finish. Soak a cloth in warm soapy water, lay it over the label, let it sit, then gently peel. Any leftover residue? Dab with a little lemon oil – it’s gentle, works, and smells good.
Now, let’s talk about pro tips I’ve picked up over the years, because even with the right method, small mistakes cause smudging. First, work in a well-ventilated space if you’re using any solvents – no need to breathe in fumes. Second, always test any cleaning product on a tiny, hidden spot of the surface first. I can’t stress this enough – a label on the front of a mirror is different than one on the back, so test on the back edge before cleaning the front. Third, use the right tools. Microfiber cloths are non-negotiable – they’re soft, trap sticky particles without leaving lint, so no smudges. A plastic scraper (the kind you use for window tint, not a kitchen knife) works if you have a little leftover residue, but only use it at a shallow angle (15 degrees from the surface, not straight up) so you don’t scratch. Fourth, patience is key. Rushing is what leads to smudging. If a label won’t peel, hit it with heat or let it soak a little longer – don’t yank.
Wait, let’s address the elephant in the room: what if you already smudged the adhesive? Can you fix that? Yes, actually. Take a clean microfiber cloth dampened with a little rubbing alcohol, and dab at the smudge in one direction. Don’t rub back and forth. If the smudge is really thick, put a drop of dish soap on warm water, and dab gently. Most of the time, you can lift that smudged residue off without making it worse. I’ve had to fix this myself on a customer’s order last month – they peeled a label off a glass jar too fast, smudged it, and we used the dab method to get it all clean.
At the end of the day, the best way to avoid smudging when cleaning adhesive labels is to prevent having to do extra work. When you order custom adhesive labels from us, we give free care sheets with simple removal tips tailored to our label products. For example, our removable paper labels? They peel off cleanly in 90-degree weather with a little heat. Our permanent vinyl labels? Need a little more time and heat, but if you follow the steps, no smudges. We test every single adhesive we use to make sure it’s easy to remove when you need it, because we know the frustration of sticky messes.
Whether you’re a small business owner restocking product inventory, a homeowner upcycling thrifted items, or an office worker clearing out old files, getting adhesive labels off without smudging doesn’t have to be a nightmare. It’s all about working with the adhesive, not against it – slow down, use the right method for your surface, and skip the harsh scrubs.
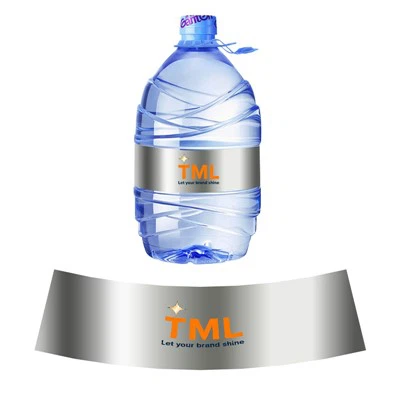
If you’re tired of struggling with label removal, or you’re in the market for durable, easy-to-remove adhesive labels for your products, hit us up to chat procurement. We work with all kinds of businesses, from local coffee shops to e-commerce brands, and can help you pick the perfect label type for your needs, plus give you customized removal tips once your labels arrive. No hidden fees, no weird hoops – just straightforward help for all your label needs.
Shrink Sleeves References:
- Adhesive Removal: Principles and Practice. RSC Publishing, 2018.
- “Surface Cleaning for Polymer Adhesives.” Journal of Adhesion Science and Technology, vol. 32, no. 15, 2018, pp. 1621-1637.
- “Label Adhesion and Removal for Common Packaging Surfaces.” Packaging Technology and Science, vol. 29, no. 4, 2016, pp. 189-202.
- “Gentle Cleaning Methods for Delicate Surfaces.” Journal of Cleaning Science, vol. 10, no. 2, 2020, pp. 45-52.
TML Packaging Co., Ltd.
TML Packaging Co., Ltd. is well-known as one of the leading adhesive labels manufacturers and suppliers in China. Please feel free to buy high quality adhesive labels at competitive price from our factory. Contact us for more details.
Address: Room 423, Building 5, Xixi First Building, Xihu District, Hangzhou City, Zhejiang Province
E-mail: sales@T-M-L.com
WebSite: https://www.t-m-l.com/
